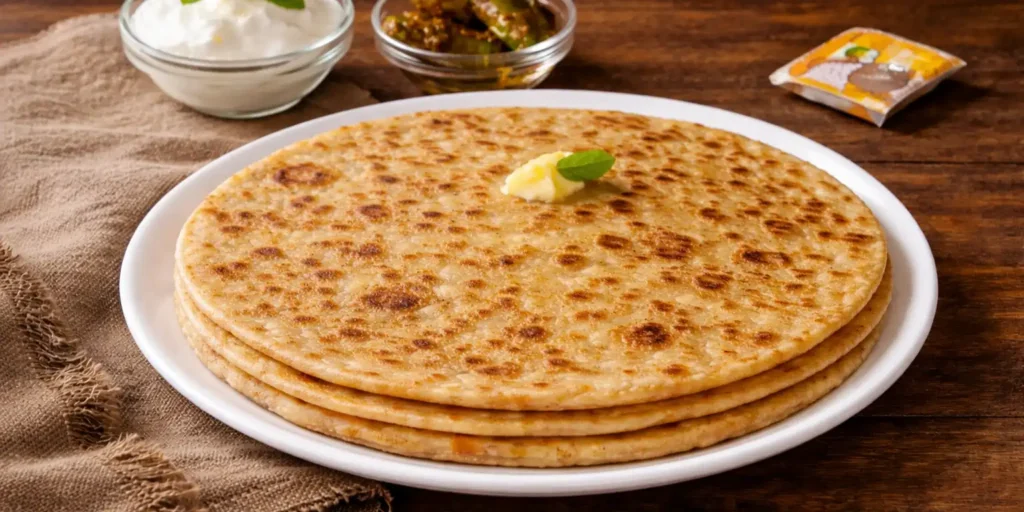
Gobi Paratha: Punjabi Stuffed Cauliflower Flatbread for Breakfast
Hello friends! Today I am sharing one of the most beloved Punjabi breakfast dishes – Gobi Paratha. This stuffed flatbread filled with spiced cauliflower is a favorite in every North Indian home. The crispy outside, soft inside, and the flavorful cauliflower stuffing make it absolutely delicious .
Imagine the smell of paratha cooking on a tawa with ghee. The aroma of cumin, ginger, and green chilies mixing with cauliflower fills the whole kitchen. When you bite into a hot Gobi Paratha with butter melting on top, it feels like pure bliss. This is the kind of breakfast that makes your whole day good .
Making Gobi Paratha at home is not difficult. You just need to prepare a spiced cauliflower filling, stuff it in dough, and roll it carefully. With a little practice, you can make perfect parathas just like your mother or grandmother makes. Let me show you how to make this delicious Gobi Ka Paratha step by step.
Ingredients for Perfect Gobi Paratha
This recipe makes 6-8 parathas.
For the Dough:
- 2 cups Whole Wheat Flour (Atta)
- ½ teaspoon Salt
- 1 tablespoon Oil or Ghee
- Water for kneading (as needed)
For the Gobi Stuffing:
- 3 cups Cauliflower (Gobi) – finely grated
- 1 medium Onion – finely chopped (optional)
- 2-3 Green Chilies – finely chopped
- 1 inch Ginger – grated
- 2 tablespoons Coriander Leaves – chopped
- ½ teaspoon Cumin Seeds (Jeera) – lightly crushed
- ½ teaspoon Fennel Seeds (Saunf) – crushed (optional)
- ½ teaspoon Garam Masala Powder
- ½ teaspoon Red Chilli Powder (adjust to taste)
- ½ teaspoon Amchur Powder (Dry Mango Powder) or Chaat Masala
- Salt to taste
For Cooking:
- Ghee or Oil for roasting parathas
- Dry Flour for dusting

Step-by-Step Recipe Method
1st Step: Prepare the Dough
- In a large mixing bowl, take whole wheat flour and salt.
- Add 1 tablespoon oil or ghee. Rub it into the flour with your fingertips.
- Add water little by little and knead into a soft, smooth dough.
- The dough should be softer than roti dough but not sticky.
- Cover the dough with a wet cloth or lid. Let it rest for 20-30 minutes.
2nd Step: Prepare the Gobi Stuffing
- Wash the cauliflower well. Grate it using a grater (large holes). You can also finely chop in a food processor.
- Put the grated cauliflower in a big bowl. Add chopped onion (if using), green chilies, and grated ginger.
- Add chopped coriander leaves, crushed cumin seeds, crushed fennel seeds, garam masala, red chilli powder, amchur powder, and salt.
- Mix everything very well with your hands.
- Important: Do not add water to the stuffing. Cauliflower will release water when mixed with salt. Let it sit for 5 minutes.
- After 5 minutes, squeeze the stuffing tightly in your palms to remove excess water. This is very important so paratha doesn’t break.
3rd Step: Divide Dough and Stuffing
- After resting, knead the dough again lightly.
- Divide the dough into equal lemon-sized balls (6-8 balls).
- Divide the stuffing into equal portions, slightly smaller than the dough balls.
- Roll each stuffing portion into a tight ball.
4th Step: Stuff the Paratha
- Take one dough ball. Press it flat with your fingers.
- Roll it slightly into a small poori (about 3 inches wide).
- Place one stuffing ball in the center of the poori.
- Bring the edges of the dough up and over the stuffing. Pinch and seal at the top.
- Press the sealed ball gently to flatten. Make sure no stuffing is visible and seal is tight.
- Dust the stuffed ball with dry flour.
5th Step: Roll the Stuffed Paratha
- Place the dusted stuffed ball on rolling surface.
- Press gently with your fingers to flatten slightly.
- Using a rolling pin, roll gently into a round paratha, about 6-7 inches wide.
- Roll slowly and carefully so stuffing does not come out. Apply even, gentle pressure.
- If any stuffing tries to come out, dust with flour and seal again.
- Roll all parathas similarly. Keep them aside dusted with flour.
6th Step: Cook the Paratha
- Heat a tawa or griddle on medium-high heat.
- Place the rolled paratha on the hot tawa.
- When small bubbles appear on the surface (after about 30-40 seconds), flip it.
- Cook the other side for 30 seconds.
- Apply ghee or oil on the cooked side. Flip again.
- Apply ghee on the other side as well.
- Press gently with a spatula while cooking. This helps paratha cook evenly and become crispy.
- Cook until both sides have golden brown spots and paratha is fully cooked.
- Remove from tawa. Repeat for all parathas.
7th Step: Serve Hot
- Serve hot Gobi Paratha with butter on top.
- Enjoy with curd, pickle, or green chutney.
Pro Cooking Tips for Perfect Gobi Paratha
- Squeeze Out Water: Cauliflower releases water when mixed with salt. Always squeeze the stuffing well before filling. This is the most important step.
- Use Fresh Cauliflower: Fresh cauliflower has less water and better taste. Avoid old cauliflower.
- Don’t Overstuff: Use the right amount of stuffing. Too much stuffing will make rolling difficult and paratha may break.
- Seal Well: Make sure the dough is sealed properly around the stuffing. Any opening will let stuffing come out while rolling.
- Roll Gently: Use gentle, even pressure while rolling. Do not press too hard.
- Cook on Medium Heat: Cook on medium heat so inside cooks properly and outside becomes crispy. High heat will burn outside and leave inside raw.
- Biggest Mistake: Not squeezing water from cauliflower. This makes stuffing wet and paratha breaks while rolling.
Variations & Substitutes to Try
- Cheese Gobi Paratha: Add grated cheese to the stuffing for kids-friendly version.
- Paneer Gobi Paratha: Add grated paneer to stuffing for extra protein and creaminess.
- Spicy Gobi Paratha: Add more green chilies and red chili powder for extra heat.
- Jain Version: Skip onion. Use only cauliflower, ginger, green chilies, and spices. Jain version is very tasty too.
- Without Onion-Garlic: This recipe naturally has no garlic. For no-onion version, skip onion and add more ginger.
- Vegan Version: Use oil instead of ghee for cooking. The stuffing is already vegan.
- Baked Gobi Paratha: Brush with oil and bake at 200°C for 15-20 minutes, flipping once. Healthier option.
Serving Suggestions: Best Ways to Enjoy
- With Curd: Serve hot Gobi Paratha with fresh curd (dahi). A spoon of curd with each bite is perfect.
- With Pickle: Punjabi paratha and pickle (achaar) is a match made in heaven. Use mango pickle or mixed pickle.
- With Butter: Put a dollop of butter on hot paratha. Let it melt and then eat.
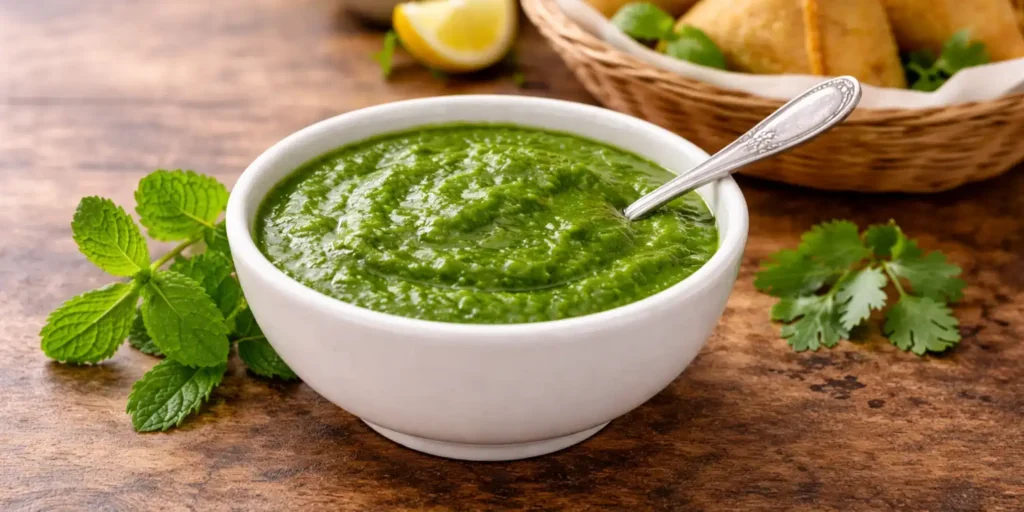
- With Green Chutney: Serve with fresh coriander-mint chutney.
- With Tea: Enjoy with hot masala chai for perfect breakfast or evening snack.
- Best Occasion: Perfect for Sunday breakfast, weekend brunch, lunch boxes, and Punjabi dinners.
FAQs: Your Gobi Paratha Questions Answered
Q1: Why does my Gobi Paratha break while rolling?
A1: This happens if stuffing is too wet. Always squeeze grated cauliflower well to remove all water. Also, seal the dough properly.
Q2: Can I use frozen cauliflower for paratha?
A2: Fresh cauliflower is best. If using frozen, thaw completely and squeeze out all water before using.
Q3: How to make paratha soft?
A3: Use soft dough and cook on medium heat. Apply ghee or oil while cooking. Do not overcook.
Q4: Can I make Gobi Paratha ahead of time?
A4: You can prepare stuffing and dough separately and keep in fridge. Stuff and roll fresh when needed. Cooked parathas can be stored for 1-2 days.
Q5: How to reheat leftover paratha?
A5: Heat a tawa and roast again with little ghee. Or microwave for 30 seconds and then heat on tawa for crispy texture.
Q6: Is Gobi Paratha healthy?
A6: Yes, cauliflower is rich in vitamins and fiber. Whole wheat flour adds fiber. Use less ghee for healthier version.
Conclusion
So friends, now you know how to make perfect Gobi Paratha at home. This Punjabi stuffed flatbread is a favorite for breakfast, lunch, or dinner. The crispy outside, soft inside, and flavorful cauliflower stuffing make it simply irresistible.
The key is to squeeze out all water from cauliflower and roll gently. With a little practice, you can make parathas just like your mother makes. Your family will love them.
I hope you try this recipe this weekend. Please make it and tell me in the comments how it turned out! Share your photos and stories. For more paratha recipes, check out our Aloo Paratha and Paneer Paratha .
Happy cooking and happy eating!