
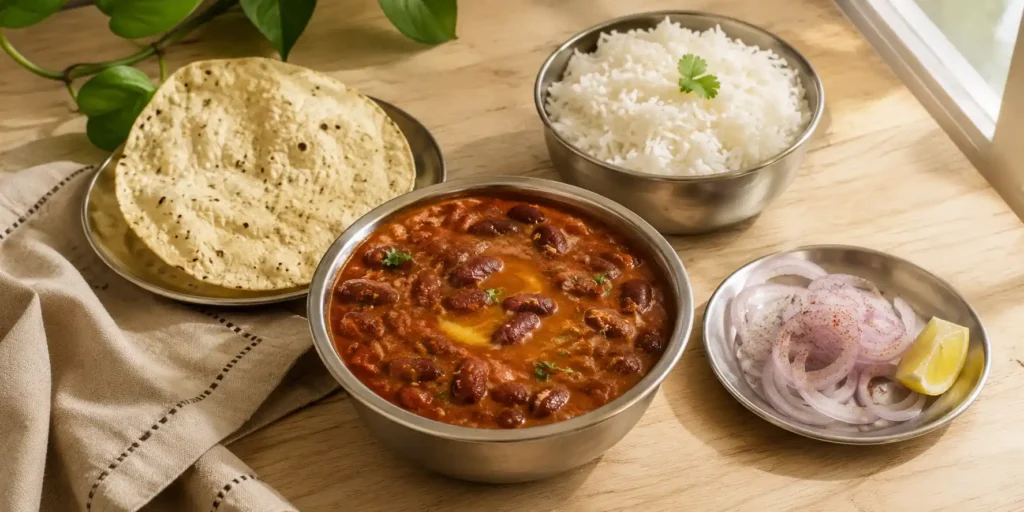
Easy rajma chawal recipe – yaar, rajma chawal ki baat hi kuch aur hai. You know that feeling when you are tired, it is raining outside, and all you want is something warm, comforting, and deeply satisfying? That is rajma chawal. The smell of onions and tomatoes sizzling in ghee, the earthy aroma of red kidney beans simmering with spices, and the sight of that thick, creamy gravy coating every grain of rice – it is pure happiness. I remember my mother’s rajma chawal. She would cook it on Sundays. The whole house would smell like garlic, ginger, and garam masala. I would eat three plates. Then sleep for two hours. No regrets.
But here is the thing. For years, I avoided making rajma at home because I thought it was complicated. Soaking overnight. Pressure cooking for ages. Spices that I didn’t have. But then I discovered this easy version. No overnight soaking. No complicated techniques. Just a pressure cooker, some basic spices, and a little patience. And the result is just as good – if not better – than the traditional version.
Easy Rajma Chawal Recipe
So here it is. My easy rajma chawal recipe. Creamy. Flavourful. Comforting. And perfect for a lazy Sunday lunch. Even my mother-in-law says it is good. That is the ultimate test.
A small tangent: I once made rajma for a North Indian friend. He took one bite and said, “Yeh toh mere ghar jaisa hai.” I almost cried. That is the highest compliment you can get.

Step-by-Step Recipe Method
1st Step: Quick Soak the Rajma
Take 1 cup of dried rajma. Wash it under running water. Place it in a bowl. Pour 2 cups of boiling hot water over it. Cover the bowl. Let it soak for 1 hour. This quick soak method works just as well as overnight soaking. The hot water softens the beans faster.
A mistake I made: I skipped soaking once and pressure cooked the rajma for 30 minutes. It was still hard. Soak. Even for an hour. It makes a difference.
2nd Step: Pressure Cook the Rajma
After soaking, drain the water. Transfer the rajma to a pressure cooker. Add 3 cups of fresh water and ½ teaspoon of salt. Close the lid. Put the whistle on. Cook on medium-high flame for 3 to 4 whistles. Then reduce the flame to low and cook for another 5 to 7 minutes. Turn off the flame. Let the pressure release naturally. The rajma should be soft and mashable between your fingers. If not, cook for 1 more whistle.
3rd Step: Prepare the Gravy Base
Heat a separate deep pan or kadhai on medium flame. Add 2 tablespoons of ghee or oil. Add cumin seeds. Let them crackle. Add the chopped onion. Sauté until golden brown – about 3 to 4 minutes. Add ginger-garlic paste. Cook for 1 minute until the raw smell disappears. The aroma will start filling your kitchen.
4th Step: Add Tomatoes and Spices
Add the chopped tomatoes. Cook for 3 to 4 minutes until they become soft and mushy. Add red chilli powder, turmeric, and coriander powder. Stir for 30 seconds. The oil will start separating from the masala – that is the sign of a perfect base.
5th Step: Add the Cooked Rajma
Add the cooked rajma along with its water (the liquid from the pressure cooker) to the pan. Stir well. Add more water if you want a thinner gravy – about ½ cup. Let it simmer on low flame for 10 to 12 minutes. The gravy will thicken and the rajma will absorb all the flavours. Mash a few beans against the side of the pan with a spoon – this gives the gravy a creamy texture.
6th Step: Add the Final Spices
Add garam masala powder, amchur powder (or lemon juice), and salt to taste. Stir well. Crush the kasuri methi between your palms and sprinkle it over the curry. Let it simmer for another 2 minutes.
7th Step: Cook the Rice
While the rajma is simmering, cook the rice. Wash the basmati rice under cold water until the water runs clear. Soak for 10 minutes (optional). In a pot, bring 2 cups of water to a boil. Add salt and rice. Cook on medium flame until the rice is fluffy and cooked – about 10 to 12 minutes. Drain any excess water. Add a teaspoon of ghee for shine.
8th Step: Serve and Garnish
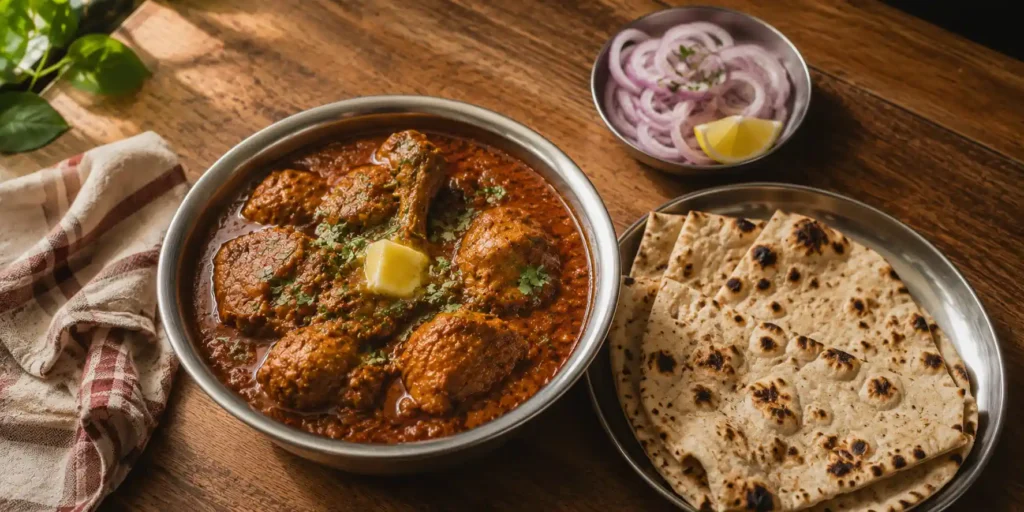
Transfer the rajma to a serving bowl. Garnish with fresh coriander leaves, a dollop of butter or ghee, and a sprinkle of kasuri methi. Serve hot with steamed rice, sliced onions, and lemon wedges on the side.
Pro Cooking Tips
-
Mistake to avoid: Adding salt before the rajma is fully cooked. Salt can harden the beans. Add salt at the end of the pressure cooking or in the gravy.
-
Creaminess hack: Mash a few rajma beans with a spoon while simmering. The starch released will thicken the gravy naturally.
-
Quick soak alternative: If you forget to soak, bring the rajma to a boil with water, turn off the flame, and let it sit for 2 hours. Works like a charm.
-
Flavour boost: Add a pinch of hing (asafoetida) to the tempering. It adds a subtle depth.
-
Leftover rajma: Rajma tastes even better the next day. Store in the fridge for up to 3 days. Reheat with a splash of water.
-
Rice tip: Use aged basmati rice for the best texture. Soak for 10 minutes before cooking.
Variations & Substitutes
Healthy version: Use less oil (1 tablespoon). Add extra vegetables like spinach or bottle gourd to the gravy. Use brown rice or millets instead of white rice.
Jain version: No onion, no garlic. Skip them. Add hing (asafoetida) in the tempering. Use rock salt. Use tomatoes, ginger, and green chillies. All other spices are fine.
Without onion-garlic: Skip onion and garlic. Add hing and a little extra ginger. Works well.
Vegan version: Use oil instead of ghee. Ensure no dairy in the garnishes. Use coconut oil for a different flavour.
Kashmiri version: Add 1 teaspoon fennel powder and a dash of cinnamon. Also add a spoonful of curd for a tangy twist.
Protein-packed version: Add boiled soya chunks along with the rajma. They absorb the gravy and add texture.
Serving Suggestions
Serve this easy rajma chawal recipe with:
-
Steamed basmati rice – the classic pairing
-
Sliced onions with a squeeze of lemon and a sprinkle of chaat masala
-
A bowl of curd or raita – cools down the spice
-
Pickle – a little tangy kick
-
Papad – crispy crunch on the side
Best time to enjoy? Sunday lunch with the family. Rainy evenings when you want something warm. Or any day when you need a hug in a bowl. Also perfect for when you have guests and want to serve a classic Indian meal.
For another classic Indian comfort dish, check out my Dhaba Style Dal Fry Recipe on Luckky Corner – it is smoky, buttery, and perfect with roti. And if you want a quick one-pot meal, try my Veg Biryani in Pressure Cooker – ready in 20 minutes.
FAQs
Is rajma chawal healthy?
Yes, it is packed with protein, fibre, and complex carbs. Rajma is rich in iron and folate. Rice provides energy. It is a complete meal when paired with a vegetable or curd.
Can I make rajma without a pressure cooker?
Yes. Cook the soaked rajma in a pot with 4 cups of water for 45 minutes to 1 hour, or until soft. Then follow the same steps for the gravy.
Why is my rajma not soft?
Either it was not soaked long enough, or it needs more pressure cooking time. Soak for at least 1 hour in hot water. Cook for 3 to 4 whistles, then low flame for 5 minutes.
Can I use canned rajma?
Yes. Use 2 cans of cooked rajma. Drain and rinse. Add directly to the gravy. Cook for 5 to 7 minutes. The taste will be slightly different, but it works in a pinch.
How do I make rajma gravy thicker?
Mash a few beans against the side of the pan. You can also add a tablespoon of roasted besan (gram flour) mixed with water, but mashing is better.
Can I freeze rajma chawal?
Freeze the rajma curry in an airtight container for up to 2 months. Freeze rice separately. Thaw in the fridge overnight. Reheat the curry in a pan, and the rice in a pot with a splash of water.
Conclusion
This easy rajma chawal recipe is my go-to comfort meal. The rajma is creamy, the gravy is thick and flavourful, and the rice is fluffy and perfect. It takes a little time, but it is so worth it. My family now asks for this every Sunday. My kids eat it without complaining. Even my mother-in-law says it is good. I have achieved everything.
Make it this weekend. Soak the rajma. Simmer the gravy. Cook the rice. Then sit down, take a deep breath, and enjoy every bite. Then come back here and tell me – did your rajma get soft? Did you add extra garam masala? Did you eat three plates like I do? I want to hear all your rajma stories. And remember – the secret to rajma chawal is patience. And a little love.