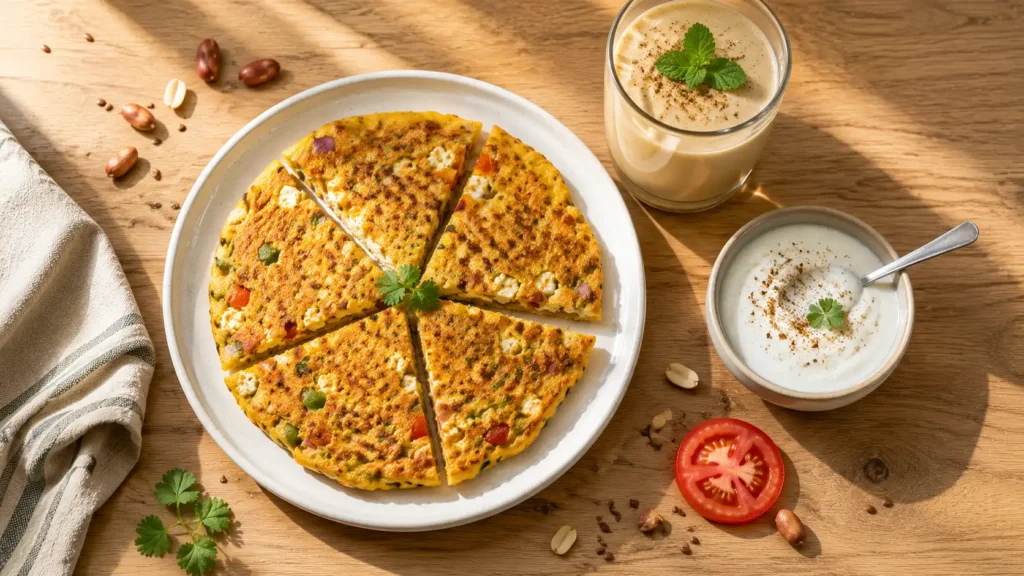

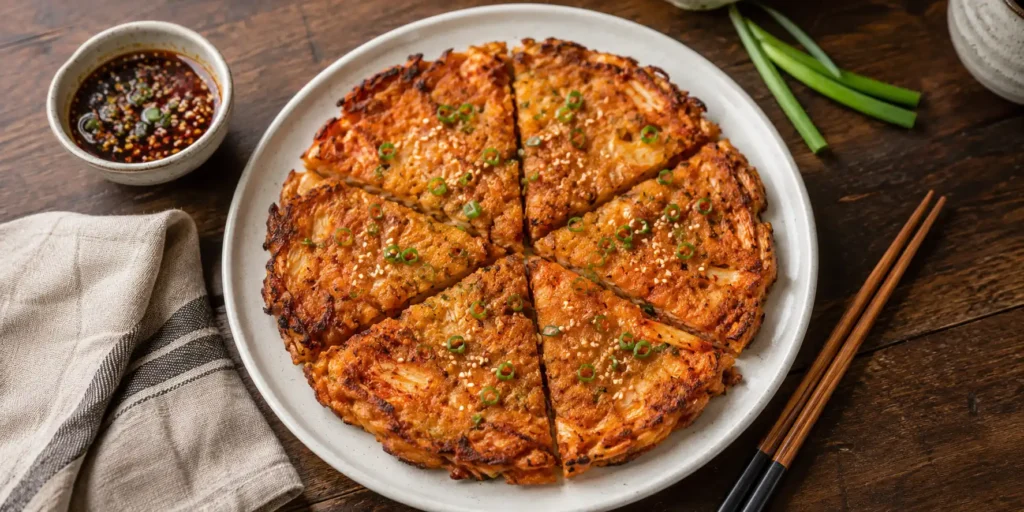
Kimchi jeon – the first time I made it, my kitchen smelled like a Korean grandmother’s house had a fight with a Delhi street food stall. Actually, it smelled kind of amazing. Tangy, spicy, garlicky. The sound of the batter hitting the hot oil – that satisfying sizzle – is like music. And the texture? Crispy on the edges, soft and chewy in the centre, with little bursts of sour kimchi in every bite. I was hooked.
I discovered kimchi jeon by accident. I had a jar of homemade kimchi sitting in my fridge for two weeks. It was getting old. You know, that super sour, funky stage where eating it raw feels like a challenge. I was about to throw it away. Then I remembered: Koreans make pancakes with old kimchi. Genius. So I chopped it up, mixed a simple batter, and poured it into a hot pan. The result was so good that I made it three times that week. My wife said, “Are we ever going to eat normal food again?” I said, “This is normal now.”
Kimchi Jeon
For Indian homes, kimchi jeon is like our besan chilla’s spicy Korean cousin. It is quick, uses minimal ingredients, and is perfect for when you want something savoury and crispy without too much effort. Plus, it is a great way to use up old kimchi that is too sour to eat raw.
A small tangent: I once tried to flip the pancake like a pro chef. It landed on the floor. My dog ate it before I could react. So use a spatula. Keep your ego aside.

Step-by-Step Recipe Method
1st Step: Prepare the Kimchi
Take the fermented kimchi. Squeeze out a little excess liquid but save the liquid – you need 2 tablespoons of kimchi juice. Chop the kimchi into small, bite-sized pieces. Do not chop too fine; you want chunks that you can taste. Place the chopped kimchi in a bowl. Add the sliced onion and the white parts of spring onions. Mix.
A mistake I made: I used fresh, newly made kimchi. The pancake was bland. Old, sour kimchi is the secret. Let your kimchi age for at least 2 weeks in the fridge.
2nd Step: Make the Batter
In a large mixing bowl, whisk together the flour, cornflour, salt, pepper, soy sauce, and sugar. Slowly add the cold water while whisking. The batter should be thin – like buttermilk or a little thinner than regular pancake batter. Do not overmix; small lumps are fine.
Add the 2 tablespoons of kimchi juice to the batter. This is the flavour bomb. The batter will turn slightly pinkish-orange. That is good.
3rd Step: Combine Kimchi and Batter
Add the chopped kimchi, onions, and green chilli (if using) to the batter. Stir until everything is evenly distributed. The batter should be thick enough to coat the kimchi but still pourable. If it looks too thick, add a tablespoon of water. If too thin, add a teaspoon of flour.
4th Step: Heat the Pan
Take a large non-stick pan (or a well-seasoned cast iron skillet). Add 2 tablespoons of oil. Heat on medium-high flame. The oil should be hot but not smoking. To test, drop a tiny bit of batter – it should sizzle immediately.
5th Step: Pour and Spread the Batter
Pour the entire kimchi batter into the pan. Use a spatula or the back of a ladle to spread it into an even, round layer – about ½ cm thick. Do not make it too thick, or the centre will stay raw. Do not make it too thin, or it will burn.
Let it cook undisturbed for 2 to 3 minutes. You will see the edges turning golden brown and crispy. The top will start to bubble.
6th Step: Flip the Pancake (The Tricky Part)
Slide a wide spatula under the pancake. Lift it slightly. If it feels firm and the bottom is golden brown, it is time to flip. Add another tablespoon of oil around the edges. Flip confidently. If you are scared, use two spatulas. If you are very scared, cut the pancake into quarters and flip each piece separately.
Once flipped, press down gently with the spatula to ensure even contact with the pan. Cook for another 2 to 3 minutes until the other side is also golden and crispy.
7th Step: Make the Dipping Sauce
While the pancake cooks, make the sauce. In a small bowl, mix soy sauce, rice vinegar, sesame oil, sugar, gochugaru, and sesame seeds. Stir until the sugar dissolves. Taste – it should be salty, tangy, nutty, and a little spicy.
8th Step: Serve and Devour
Slide the kimchi jeon onto a cutting board. Cut into wedges or squares. Transfer to a plate. Sprinkle the green parts of spring onions and extra sesame seeds on top. Serve hot with the dipping sauce on the side.
Do not let it sit. Crispy pancakes get sad when they cool down.
Pro Cooking Tips
-
Mistake to avoid: Overcrowding the pan. Make one large pancake or two small ones. Do not try to make a thick pancake – it will be raw inside.
-
Crispiness hack: Use ice-cold water for the batter. Cold batter + hot oil = extra crispy edges. Also, add 1 tablespoon of potato starch or rice flour to the batter.
-
Kimchi juice is gold: Do not throw it away. The juice adds tanginess and colour. If your kimchi is dry, add a little water to the jar, shake it, and use that.
-
Leftover pancake: If you have leftovers (unlikely), reheat in a pan with a little oil – never microwave. Microwaved kimchi jeon becomes rubbery.
-
Pan size: Use a pan that is about 8 to 10 inches wide. That gives you a pancake that is easy to flip and has the perfect thickness.
-
Customising vegetables: Add thinly sliced zucchini, carrot, or mushrooms to the batter. But do not add too much – the kimchi should be the star.
Variations & Substitutes
Healthy version: Use half whole wheat flour and half rice flour. Reduce oil by using a non-stick pan and brushing oil lightly. Add extra spring onions and less kimchi juice (for lower sodium).
Jain version: Kimchi traditionally has garlic, ginger, and often onion. You can make Jain-friendly kimchi (no onion, no garlic) at home with cabbage, carrot, and spices. Then use that for the pancake. Skip green chillies if needed.
Without onion-garlic: Make kimchi without onion and garlic (there are recipes online). Then proceed. The pancake will be milder but still tasty.
Vegan version: Ensure your kimchi is vegan (no fish sauce or shrimp paste). Most store-bought vegan kimchi is available. Use maple syrup instead of sugar if you want.
Cheese kimchi jeon: Add ¼ cup shredded mozzarella or vegan cheese to the batter. The cheese melts and creates a crispy, gooey texture. Very indulgent.
Serving Suggestions
Serve kimchi jeon as a snack, appetizer, or light meal. It pairs beautifully with Korean fried cauliflower or veg jajangmyeon for a full Korean feast. Also great with steamed rice and a bowl of doenjang jjigae (soybean paste stew). The dipping sauce is essential – do not skip it.
Best time to enjoy? Rainy evenings with a glass of iced barley tea or a cold beer. Also perfect for when you have leftover kimchi and no idea what to do with it.
If you love Korean flavours, check out my Veg Jajangmyeon recipe on Luckky Corner – another Korean classic. And for a crispy, spicy snack, try my Korean Fried Cauliflower – it uses the same gochujang magic.
FAQs
What is kimchi jeon?
Kimchi jeon is a Korean savoury pancake made with fermented kimchi, flour, and water. It is crispy on the outside, chewy on the inside, and has a tangy, spicy, umami flavour.
Can I make kimchi jeon without kimchi juice?
Yes, but it will be less flavourful. Add a little extra soy sauce and a splash of vinegar to mimic the tanginess. But really, use the juice – it is liquid gold.
Why is my kimchi jeon not crispy?
Possible reasons: too much batter, not enough oil, pan not hot enough, or you did not spread the batter thin. Use a thinner batter, more oil, and a hot pan. Do not flip too early.
Can I freeze kimchi jeon?
You can freeze the cooked pancakes. Stack them with parchment paper between each, wrap tightly, and freeze for up to 2 months. Reheat in a pan or air fryer – do not microwave.
What can I use instead of gochugaru in the dipping sauce?
Use regular red chilli powder or sriracha. Or skip it – the sauce will still be good. Gochugaru has a smoky, fruity flavour, but any chilli works.
How do I store leftover batter?
Batter with kimchi does not store well because the kimchi releases water and makes it runny. Make only as much as you need. Unused batter can be refrigerated for a few hours, but stir well before using.
Conclusion
This kimchi jeon recipe turned my kitchen into a Korean street food stall. It is crispy, tangy, spicy, and so satisfying. The best part? It takes 10 minutes from start to finish. That is faster than ordering delivery. And the look on your family’s faces when you serve them a golden, crispy pancake with a spicy dipping sauce? Priceless.
Make it when your kimchi is old and funky. Make it when you need a quick snack. Make it just because you want something delicious. Then come back here and tell me – did you flip it like a pro or did it land on the floor like mine? Did you add cheese? Did you eat the entire thing standing over the sink? I need to know.