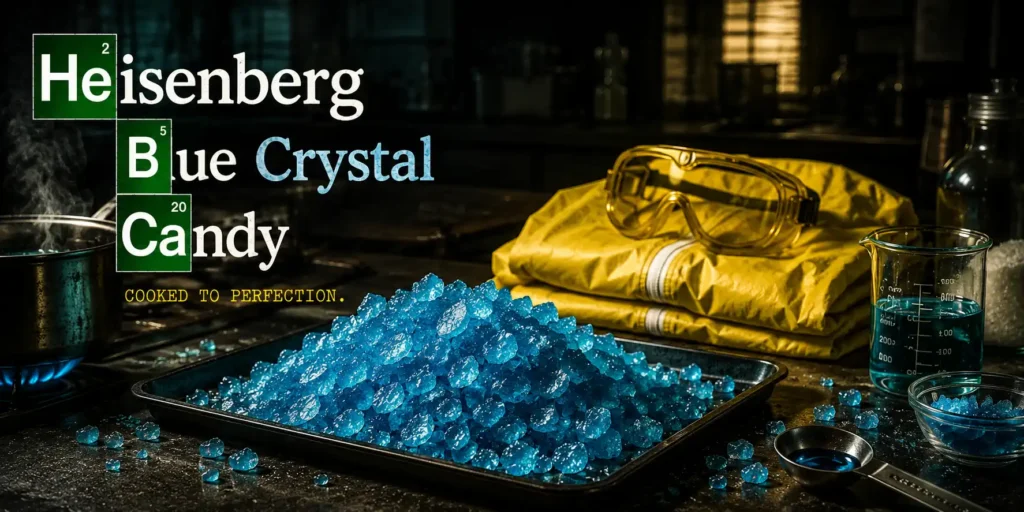
Heisenberg blue crystal – say my name. No, not that kind. I am not cooking what you think I am cooking. Relax. I am just a chemistry teacher turned food blogger. And today, we are making candy. Blue candy. The kind that looks like it came straight from an RV in the New Mexico desert. The kind that glistens under the light, with sharp edges and a colour so intense it feels illegal. But it is legal. And delicious.
I remember watching Breaking Bad for the first time. Walter White starts with chemistry, ends with… well, you know. But one thing always fascinated me – that blue colour. The purity. The crystal structure. And I thought, why not make something that looks exactly like that but tastes like blue raspberry and sugar? No meth. Just meth-odical cooking.
Heisenberg Blue Crystal Candy Bites
So I went into my kitchen – my lab – and started experimenting. The first batch? Too dark. Looked like bruised blueberries. The second batch? Too pale, like frozen ice. But the third batch? Ah, the third batch was perfect. Clear, sharp, with a brilliant azure glow. And the taste? Sweet, slightly tart, with a crunch that shatters like glass. This heisenberg blue crystal candy is a tribute. To the show. To chemistry. To the idea that sometimes, the forbidden fruit is just sugar and food colouring.
A small tangent: My neighbour saw me wearing safety goggles and pouring blue liquid into a pan. He asked if I was starting a drug lab. I said, “I am the one who knocks… on your door to offer candy.” He laughed nervously. I gave him a piece. He asked for more.
So let us cook. Carefully. Precisely. Like scientists.

Step-by-Step Recipe Method
1st Step: Prepare Your Lab – I Mean Kitchen
Clear your counter. Put on your safety goggles. Line a baking tray with a silicone mat or grease it with butter. Keep everything within arm’s reach. Candy making is like a chemical reaction – once it starts, you cannot pause. No phone calls. No distractions. No Jesse Pinkman asking stupid questions.
A mistake I made: I forgot to grease the tray. The candy stuck like it was welded. I had to chip it off with a hammer. Not ideal.
2nd Step: Combine the Base Ingredients
In a heavy-bottomed saucepan, combine sugar, corn syrup, water, and cream of tartar. Stir gently with a heat-resistant spatula – just until combined. Do not stir vigorously; that creates crystals. You want a smooth, uniform mixture. It will look like cloudy water. But soon, it will transform.
Turn the heat to medium. Let the mixture come to a boil. Do not stir after it starts boiling. I repeat – no stirring. Stirring causes sugar crystals to form and your candy will be gritty, not glassy.
3rd Step: Monitor the Temperature – The Purity Test
Clip your candy thermometer to the side of the pan. Make sure the tip is submerged in the liquid but not touching the bottom. Let the mixture boil. Watch the temperature rise. 100°C… 120°C… The bubbles will get smaller, the liquid will thicken. You are looking for 150°C to 155°C – that is the “hard crack” stage. At this temperature, the sugar syrup will solidify into a hard, brittle candy.
This is the moment of truth. Too low, and your candy will be chewy. Too high, and it will taste burnt. Walter White would say, “Precision is everything.”
4th Step: Remove from Heat and Add Colour + Flavour
When the temperature hits exactly 150°C, remove the pan from the heat. Immediately add the blue food colouring (10 to 15 drops) and the optional neon green (1 drop). Add the blue raspberry extract and lemon extract. Stir quickly but gently. The mixture will bubble and release steam – that is normal. The colour will transform from clear to a deep, electric blue. It looks like a science experiment gone right.
Work fast. The candy hardens in minutes.
5th Step: Pour and Shape the Crystals
Pour the hot blue liquid onto your prepared silicone mat or greased tray. Do not spread it too thin – you want thickness, like crystal shards. Let it sit for 30 seconds. Then, using a butter knife or a metal spatula, score lines into the cooling candy to create jagged, rock-like shapes. Do not cut all the way through – just mark the surface. Alternatively, let it cool completely and then smash it with a rolling pin (the fun way).
I prefer the smash method. It feels like you are breaking bad. Wrap the candy in a towel, then hit it with a rolling pin. The pieces will be irregular, sharp, and beautiful – like blue crystals.
6th Step: Dust with Powdered Sugar
Transfer the broken candy pieces to a bowl. Sprinkle with a little powdered sugar or cornstarch. Toss gently. This prevents them from sticking together and adds a slightly “dusty” look – like they just came out of a lab.
7th Step: Cure (Optional but Recommended)
Let the candy sit at room temperature for 2 to 3 hours. This allows any remaining moisture to evaporate. The texture becomes harder and more brittle. Store in an airtight container. If they get sticky, add more powdered sugar.
8th Step: Serve with a Warning
Place the blue crystal candy bites in a small glass vial or a ziplock bag. Hand them to your friends. When they ask, “What is this?” – you say, “Say my name.” Then laugh and say, “It’s just candy. But it looks cool, right?”
Pro Cooking Tips
-
Mistake to avoid: Humid weather. Candy making hates humidity. If it is raining or very humid, your candy will absorb moisture and become sticky. Wait for a dry day. Or run your AC.
-
Thermometer accuracy: Test your candy thermometer before starting. Place it in boiling water – it should read 100°C. If it is off, adjust your target temperature accordingly.
-
Safety first: Hot sugar is like lava. It sticks to skin and causes severe burns. Keep a bowl of ice water nearby. If you spill on yourself, put the area in cold water immediately. Do not lick it. That is not a Breaking Bad joke – it is real.
-
Colour intensity: Gel colours are more concentrated than liquid. Start with 10 drops, then add more if needed. Too much liquid colour can affect the texture.
-
Clean up: Hardened sugar is difficult to clean. Soak your pan in hot water for an hour. Do not scrape – the sugar will dissolve.
-
Storage: Keep in an airtight container with silica gel packets (those little “do not eat” packets). They absorb moisture and keep the candy crunchy.
Variations & Substitutes
Healthy version: There is no healthy version of hard candy. It is sugar. Embrace it. Or make it with erythritol and isomalt – but that is advanced chemistry.
Jain version: No animal products – sugar is fine (check if processed with bone char, use organic sugar). No onion, garlic – obviously. Safe.
Without onion-garlic: Already without.
Vegan version: Yes, as long as your sugar is vegan (organic or unrefined). No animal-derived colouring – most gel colours are synthetic and vegan.
Green version (Heisenberg’s rival): Use green food colouring and apple extract. Call it “Gus Fring’s Verde Candy.”
Sour version: Add 1 teaspoon citric acid powder at the end. It gives a sour punch that contrasts with the sweetness.
Serving Suggestions
Serve these heisenberg blue crystal candy bites as a novelty dessert at themed parties, Breaking Bad watch parties, or Halloween. Put them in small glass vials (available on Amazon) tied with a ribbon. Label them “99.1% Pure” or “Blue Sky.” Pair with a blue cocktail or a non-alcoholic blue raspberry slushie.
Best time to enjoy? When you want to confuse your guests. When you need a conversation starter. Or when you just like pretending you are a chemistry genius.
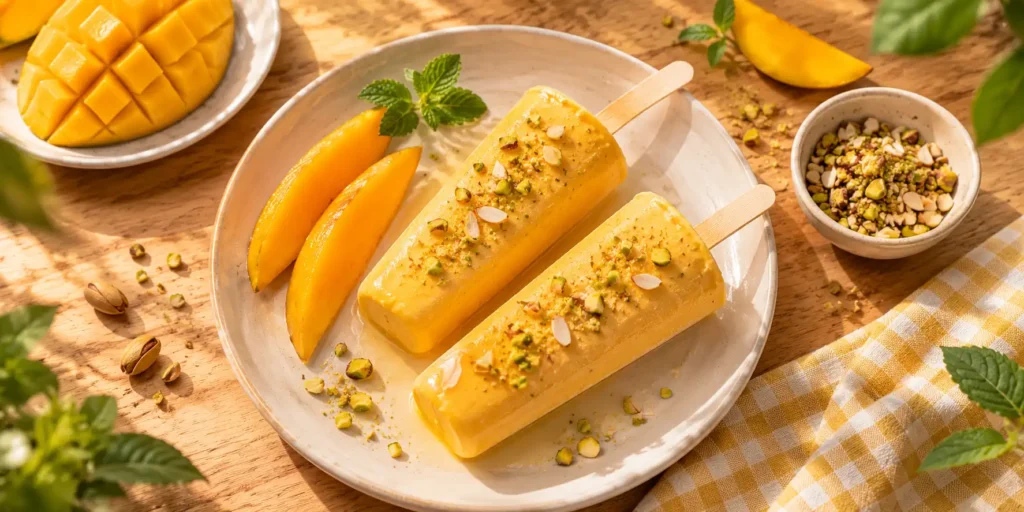
For another fun, geeky dessert, check out my Mango Kulfi Recipe on Luckky Corner – it is blue-free but equally addictive. And if you want a sweet that looks like lab equipment, try my Jelly Test Tube Shots – perfect for science-themed parties.
FAQs
What is heisenberg blue crystal candy?
It is a hard, brittle candy made from sugar, corn syrup, and blue food colouring, shaped to look like the blue crystal meth from the TV show Breaking Bad. It is completely safe and delicious – just sugar and flavour.
Is this candy safe to eat?
Yes. It is regular hard candy. No drugs, no chemicals (other than food-grade ingredients). The colour is FDA-approved food colouring. Do not confuse it with the real thing.
Can I make this without a candy thermometer?
Not recommended. The temperature needs to be precise – hard crack stage is between 150°C and 155°C. Without a thermometer, you can drop a small amount into cold water; if it forms hard, brittle threads that snap, it is ready. But a thermometer is better.
Why is my candy sticky or chewy?
You did not reach the hard crack stage. The temperature was too low. Next time, heat to 150°C. Also, humidity can make hard candy sticky.
Can I use natural blue colouring?
Yes. Use butterfly pea flower powder (blue) or spirulina powder. Mix with a little water to make a paste. The colour will be less intense and may fade over time. Add a pinch of baking soda to enhance the blue.
How long does this candy last?
In an airtight container at room temperature, away from moisture, it lasts 2 to 3 months. Do not refrigerate – condensation makes it sticky.
Conclusion
This heisenberg blue crystal candy is my tribute to the greatest antihero in television history. It looks dangerous, tastes innocent, and makes you feel like a chemistry genius. The process is precise, a little risky, and deeply satisfying. Just like Walt’s journey – but with a happier ending. No one gets hurt. No one goes to jail. You just get delicious, crunchy, electric-blue candy.
Try it. But remember – you are not a drug lord. You are a cook. A candy cook. Say my name. Say “Nice recipe.” And then come back here to tell me – did you wear the goggles? Did you accidentally scare your neighbours? Did your candy turn out perfect on the first try? I am the one who comments.